Add the printer to your list of available printers: Click the Add Printer, Scanner or Fax button on the right. A dialogue appears listing printers on your local network. It may take a minute or two for your printer to appear. Show
If your printer still doesn’t appear in the list, try adding the printer by its IP address (see below). If you can print to the newly added printer queue, delete the old printer queue. If you can’t add the printer because it doesn’t appear in the list of available printers, it may be turned off, or your Mac may be on a different network now. If the printer was shared by another user, the user may have stopped sharing it, or the user’s Mac may be offline. If you don’t manage the printer, ask the person who does for help. Operation could not be completed (error 0x00000709). Double check the printer name and make sure that the printer is connected to the network. If the default printer does not change or the printer you have shared on the network is not installed on the target computer, this article offers you solutions. Operation could not be completed (error 0x00000709). Double check the printer name and make sure that the printer is connected to the network. As you can see in the screenshot above, you may experience this problem, especially on a computer using a network printer. I also had this problem and I wrote an article about the solutions. This article provides you with alternative methods for finding solutions. Lets check the solutions. Always make a backup of the registry before making any changes to Regedit! Solutions 1 — Regedit I’ve already mentioned that it’s a good idea to make a backup before making changes to the registry, just right-click and select Export.
Find the path: HKEY_CURRENT_USER\ Software\Microsoft\Windows NT\CurrentVersion\Windows right click the Windows directory click Permissions… On the Security tab, if there are no System and Administrator users in the group or user names, add them and grant Full Control permission. If these users exist, check the permissions. Save and exit the settings and restart the computer. Try again what you want to do with the printer. If it is not fixed, add Everyone to the users I mentioned in the steps above and give full control, save, exit and restart. Với dân văn phòng, việc lỗi kết nối máy tính với máy in, cụ thể là “Windows cannot connect to the printer” chắc hẳn đã không còn quá xa lạ. Trong bài viết dưới đây, Phong Vũ sẽ chia sẻ đến các bạn chi tiết các cách để khắc phục được lỗi Windows cannot connect to the printer này không chỉ đơn giản mà còn lại rất hiệu quả.
Lỗi Windows cannot connect to the printer là một trong các lỗi thường xuất hiện khi người dùng cố gắng kết nối máy in mạng hoặc máy in có chia sẻ trong mạng nội bộ với máy tính đang chạy hệ điều hành Windows. Xuất phát điểm của thông báo lỗi Windows cannot connect to the printer này chính là sai lệch trong việc xác định mấy in, thiết lập kết nối hoặc khi Windows gặp trở ngại trong việc kết nối máy in đó, kèm theo những mã lỗi như 0x0000007e, 0x0000007a, 0x0000011b hoặc 00×00000002. 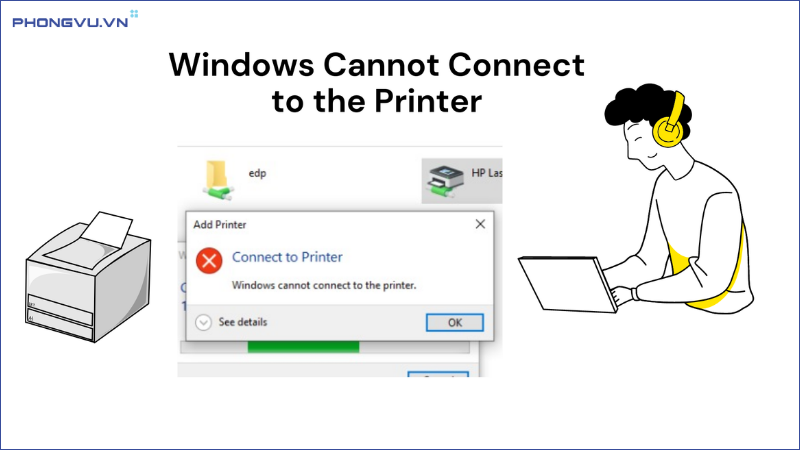Thông báo lỗi Windows cannot connect to the printer. Khi thông báo này hiển thị, dĩ nhiên bạn sẽ không in được. Nó có thể tạo ra sự cố và gây ảnh hưởng đến năng suất làm việc khi người dùng không thể in được các tài liệu cần thiết. Lúc này, người dùng cần phải kiểm tra kết nối mạng, xem xét cài đặt lại driver của máy in hoặc kết nối máy tính với một máy in khác. Tuy nhiên, để tìm được giải pháp tối ưu nhất, hãy cùng Phong Vũ điểm qua nguyên nhân xảy ra lỗi Windows cannot connect to the printer dưới đây để xác định tình trạng của máy và có biện pháp phù hợp nhất. 2. Nguyên nhân xảy ra lỗi Windows cannot connect to the printerThông báo lỗi Windows cannot connect to the printer thường xảy ra trên Windows 7. Thực tế, có rất nhiều nguyên nhân dẫn đến lỗi như Driver máy in; máy in được cấu hình không đúng; máy in không thể kết nối với máy tính hoặc mạng của máy tính; máy tin đang ở trạng thái tắt… Chính vì thế, người dùng cần phải kiểm tra lại các đường dây tín hiệu để chắc chắn được rằng các đường dây này được kết nối đúng với máy tính. Nếu máy tin đang tắt, hãy bật nó và kiểm tra đèn báo để xác định nó liệu có đang hoạt đồng bình thường hay không. Tuy nhiên, ngoài những nguyên nhân dẫn đến lỗi Windows cannot connect to the printer nêu trên, vẫn tồn tại một số nguyên nhân khác như sau:
Máy in phun đa năng màu Canon G2730 4.199.000₫ 5.490.000₫
3. Cách sửa lỗi Windows cannot connect to the printerĐể sửa lỗi Windows cannot connect to the Printer, hãy cùng Phong Vũ tham khảo ngay những cách dưới đây. 3.1. Kiểm tra lại kết nối giữa máy in và máy tínhLỗi Windows cannot connect to the printer có thể xuất hiện khi người dùng chưa thiết lập kết nối đúng cách giữa máy tính và máy in hoặc khi máy in đang nằm ở trạng thái tắt. Chính vì thế, để khắc phục tình trạng này, bạn phải kiểm tra những tín hiệu đã được báo kết nối đúng với máy tính chưa. Trường hợp máy in đang tắt, bạn hãy bật máy in, đồng thời kiểm tra xem những đèn trạng thái của máy có bật lên không. 3.2. Khởi động lại dịch vụ Printer SpoolerTrường hợp, bạn đã kiểm tra kết nối giữa máy in và máy tính nhưng vẫn không hiệu quả thì việc khởi động lại tính năng Printer Spooler Service chính là giải pháp, khả thi có tỉ lệ thành công vô cùng lớn, có thể sửa chữa triệt để lỗi Windows cannot connect to the printer. Để thực hiện biện pháp hãy, hãy làm theo thao tác dưới đây:
3.3. Tạo Local PortNgoài việc kiểm tra kết nối máy tin hoặc khởi động lại dịch vụ Printer Spooler để sửa chữa lỗi Windows cannot connect to the printer, bạn có thể tạo local Port để khắc phục tình trạng này.
3.4. Cài lại driver máy in
Máy in trắng đen đơn năng Brother HL-B2100D 3.690.000₫ 3.890.000₫
3.5. Sử dụng Troubleshooter printerĐể sửa lỗi Windows cannot connect to the printer, bạn cũng có thể dùng trình sửa chữa Troubleshooter printer để cung cấp hướng dẫn và giải quyết cụ thể vấn đề này/
Lúc này, hệ thống máy tính sẽ tiến hành kiểm tra lỗi và sửa chữa lỗi cho máy in của bạn. 3.6. Chép lại tập tin mscms.dllNgoài những cách sửa lỗi Windows cannot connect to the printer trên, bạn có thể tìm hiểu biện pháp chép lại tệp “mscms.dll” về thư mục đúng theo hướng dẫn dưới đây:
– Với hệ điều hành 64-bit là “C:windows\system32\spool\drivers\x64\3” – Với hệ điều hành 32-bit: “C:windows\system32\spool\drivers\w32x86\3”
Trên đây là các cách có thể giúp bạn sửa chữa lỗi Windows cannot connect to the printer. Phong Vũ mong rằng những nội dung này sẽ giúp được bạn khắc phục được lỗi máy tin trong công việc hàng ngày. Trường hợp, bạn đã thử tất cả những cách trên mà máy in vẫn không khắc phục lỗi, hãy liên lạc với nhà sản xuất máy in và bộ phận hỗ trợ kỹ thuật Microsoft để được hỗ trợ thêm. |